Note
Depending on your Network Permissions, the SatuitCRA® Utility may require Administrative Privileges and/or must be ‘Run As' Administrator to install correctly.
The SatuitCRA® Utility is a locally installed application that manages the creation of all Mail Merge documents and Advent Client Reports. It also allows the user to edit previously created Mail Merge templates and to determine which Advent reports will be included in client statements. Please contact the Client Success Team, support@satuit.com, for the latest version of the SatuitCRA® Utility.
Current Version: 4.0.210 - Check the version of your SatuitCRA® Utility by double-clicking on the shortcut and viewing the version number in the bottom left of the login window.
Installation/Upgrade Steps
- Download and extract the zipped utility, save this to your computer
- Uninstall the current utility by following the below steps
- If you are re-installing the Utility, upon re-installation, your settings will be remembered
- Open control panel on your computer
- Under programs, select "Uninstall a program"
- Find the utility named "SatuitCRA® utility" and select it
- Click "uninstall" in the top row
- Wait for the computer to complete the removal process
- Now find the folder with the new utility you extracted in step one
- Right-click on the file "setup.exe"
- Click "Run as administrator"
- Work your way to the end of the install process and then close
- Upon installation, a shortcut will be pushed to the user's desktop
- Click on your start bar and search for the new utility
- Open the new utility
- Log in if required
Accessing the SatuitCRA® Utility
The shortcut will look like this:

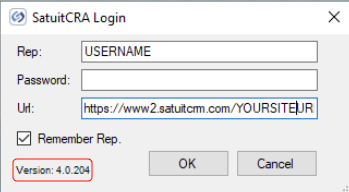
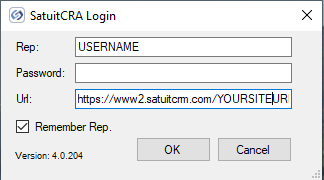
- Double click on the SatuitCRA® Utility icon found on your desktop
- Enter the SatuitCRM® or SatuitCRA® Rep Name and Password
- Enter the same URL that is used to access SatuitCRM® or SatuitSIP®
- You can also check the Remember Rep checkbox which will auto-populate the Rep field on each subsequent log in
- Click OK
Advent Axys Settings
The Advent Settings option allows the user to enter the settings to connect to either Advent Axys or APX. Without these settings entered correctly, the Advent Macros will not be generated and included in Client Packages.
- You will first need to locate the File Path where Advent Axys is installed
- Click the Start Menu → All Programs → Advent Folder → Axys Folder
- Right-click on the Axys 3 NET shortcut and choose properties
- Copy the Target path in the properties and paste it into the Path field in the SatuitCRA Utility in this format - EXAMPLE: N:\axys3\
- Copy the entire path in the properties and paste it into the User Directory field in the SatuitCRA utility in this format - EXAMPLE: N:\axys3\USERS\YOURFOLDERNAME\
- The default PDF Location will be identical to the Path location. Enter it in this format - EXAMPLE: N:\axys3\
- Set Time Out to 5
Note
Make sure all advent folders have full permissions for the user. You can do this by right-clicking the folder → click Properties → click Security → Check the permissions for the user.
Advent APX Settings
You will need to enter the APX Database Server Name, the APX SQL Server Name, and SQL Server Username and Password used for authentication. The Path, Default PDF Location and Time Out can all be set to the same settings as used for Axys.